Adding a Vendor
Vendor information is added to the division at the Manage Vendors page. A vendor has one billing address and may have multiple ship-to addresses. A vendor must be associated with a stock receipt order
How to Add a Vendor
To add a vendor to the division, please refer to the steps that follow.
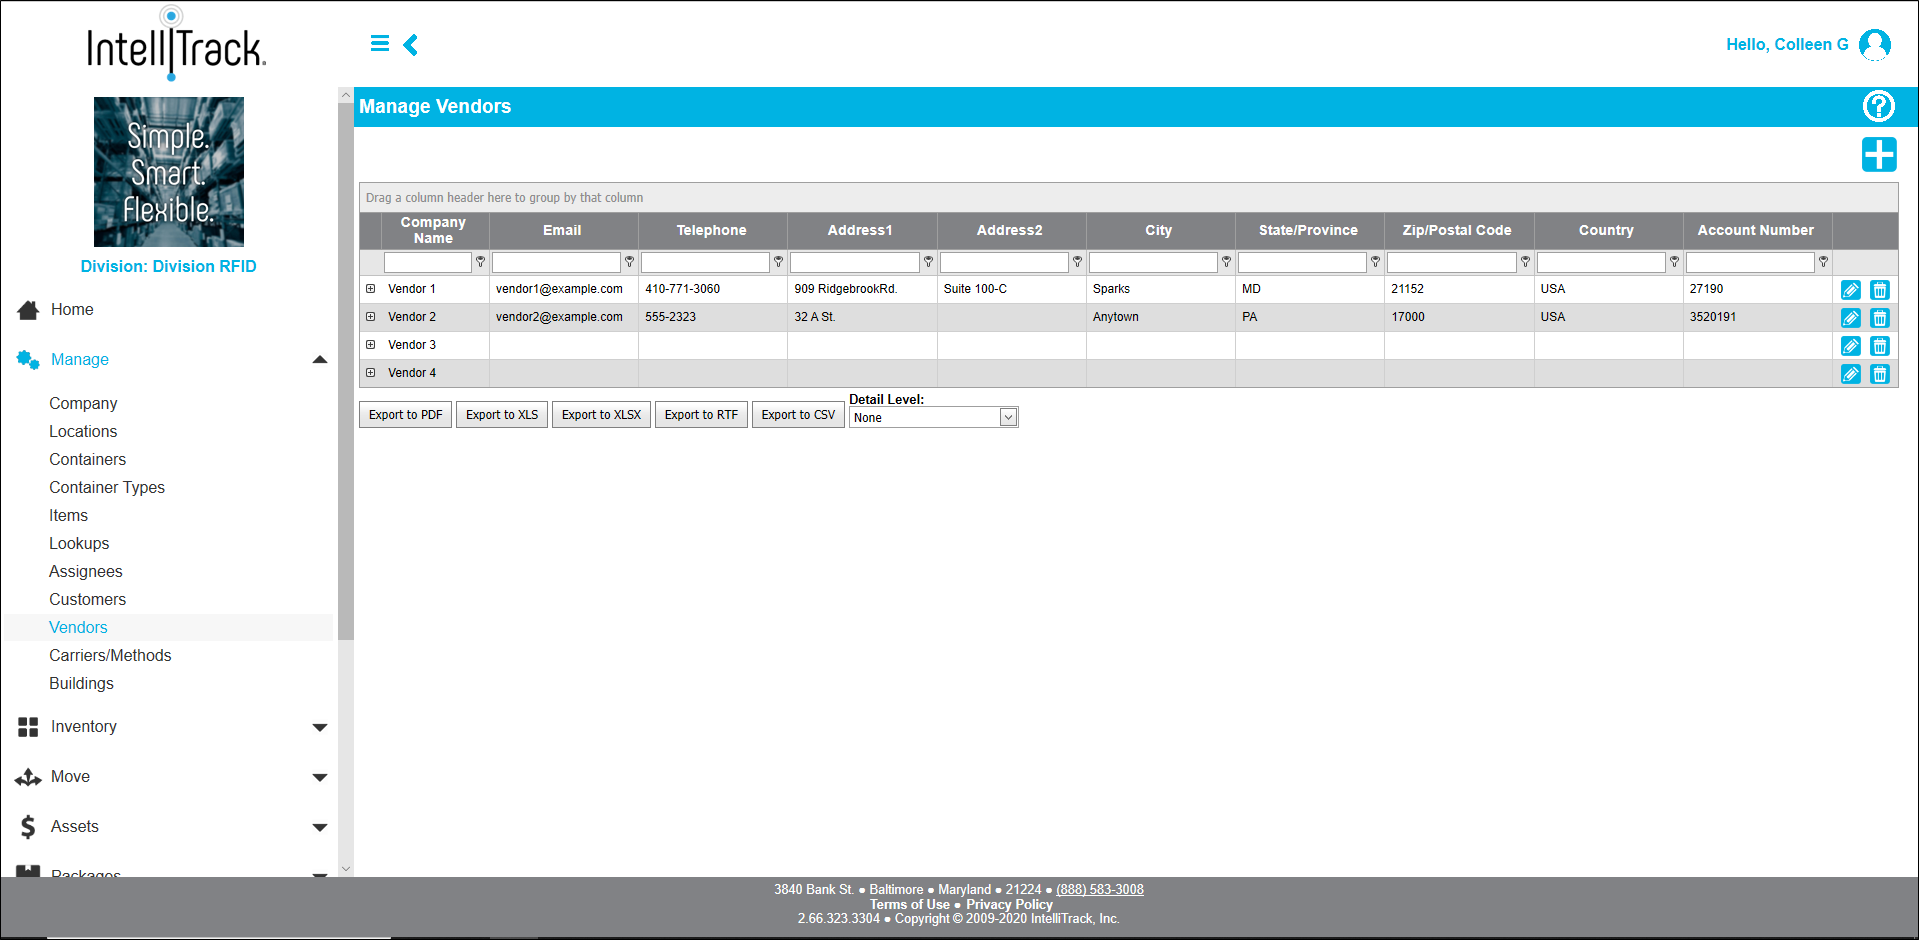
- From the navigation pane select Manage > Vendors. The Manage Vendors page appears in the work pane.
- To add a vendor, select the Add icon.

- The Add grid appears onscreen. It is above the page’s grid.
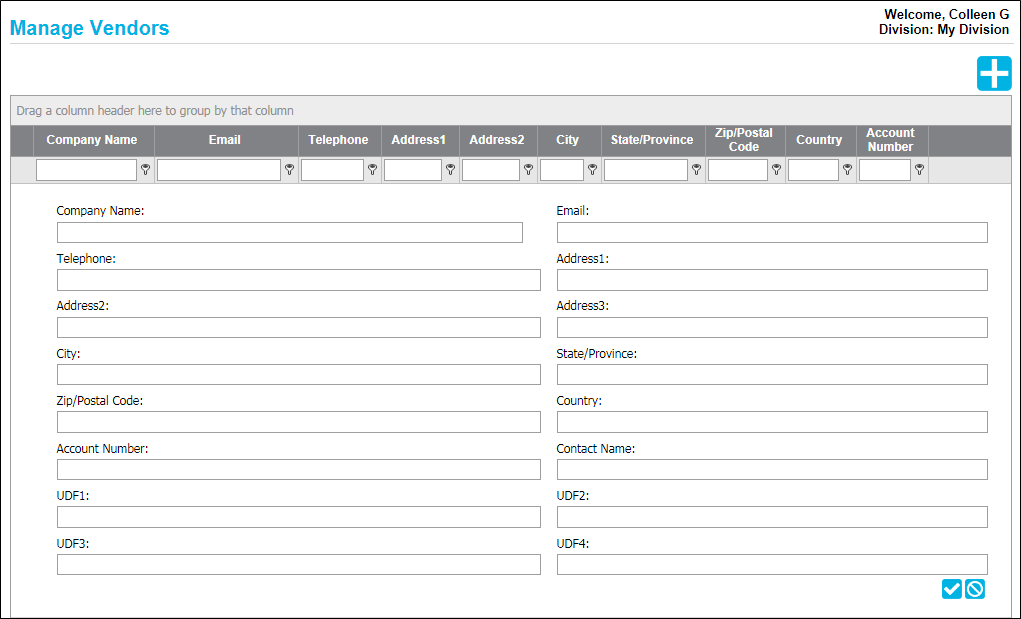
- Add the vendor information, including the Vendor's Company Name and main address information:
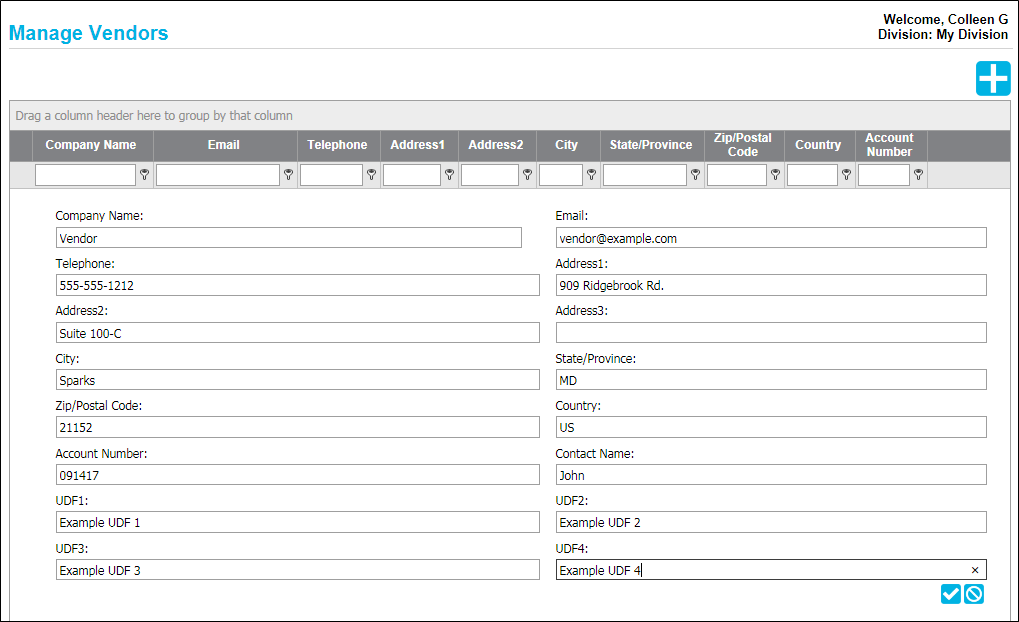
- Company Name (required): Place the cursor in the Company Name field and enter the Vendor Company Name.
- Email (optional): Enter the vendor's email in this field.
- Telephone (optional): Enter the vendor's telephone number in this field.
- Address 1 (optional): Press the Tab key to place the cursor in the Address 1 field. Enter the first address line here.
- Address 2 (optional): Press the Tab key to place the cursor in the Address 2 field. Enter the second address line here. (It is often a suite number.)
- Address 3 (optional): Press the Tab key to place the cursor in the Address 3 field. Enter the third address line here. (It is often a mail stop number or a room number.)
- City (optional): Enter the city in this field.
- State/Province (optional): Press the Tab key to place the cursor in the State/Province field. Enter the state/province in this field.
- Zip/Postal Code (optional): Press the Tab key to place the cursor in the Zip/Postal code field. Enter the zip/postal code in this field.
- Country (optional): Press the Tab key to place the cursor in the Country field. Enter the country in this field.
- Account Number (optional): Press the Tab key to place the cursor in the Account Number field. Enter the vendor's account number in this field.
- Contact Name (optional): enter the Vendor contact name in this field.
- UDF 1 through UDF 4 fields (optional): enter information specific to this vendor in the UDF1 through UDF 4 fields.
- Save icon: To add the vendor to the system, select the Save icon in the grid.

- Cancel icon: To cancel adding this vendor and discard the information that has been added, click the Cancel icon.

- Cancel icon: To cancel adding this vendor and discard the information that has been added, click the Cancel icon.
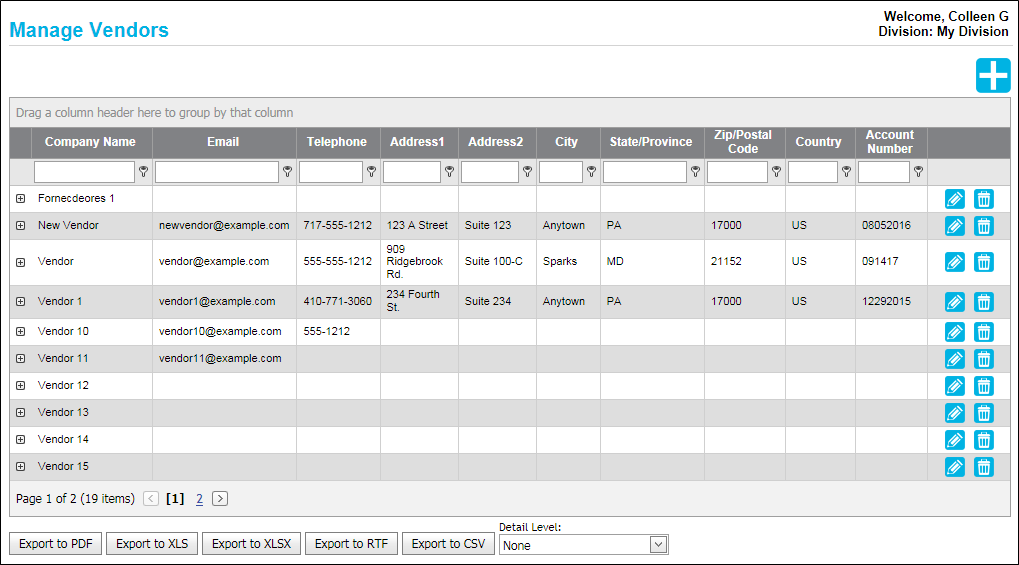
- The field clears and the Add grid closes. The new vendor is now part of the vendor list.
Vendor Ship-To Information
Once the vendor is added, you are able to add vendor ship-to information for a vendor: see "Vendor Ship-To Information". A vendor's ship-to information includes additional addresses for shipping, freight billing, etc. You may add as many ship-to addresses per vendor as you need.
Editing Vendor Information
Vendor information may be updated; see "Editing a Vendor" for more information.
Deleting a Vendor
If a vendor is not associated with any orders, the vendor may be removed from IntelliTrack. To remove a vendor, see "Deleting a Vendor" for more information.